

The dip tray stations that I've created this week are really just prettied up versions of workstations that I've used for years. The dip trays add a bit of novelty and are easy to use and store. I bought several at my local dollar store. In addition to the trays you'll need a permanent marker and some Velcro dots.

I like to provide my third graders many ways to practice identifying instruments and sorting them into their families or by their characteristics. This is another way for them to use that skill and is easy to slip into our workstations rotation.

The cards that I have used for this activity are actually from an Instrument Matching Game that you can get in my store. The dip tray has sections labeled for each of the four basic instrument families. If you use a different classification system, there is more than enough room to write those categories instead of the basic four.
I used a permanent marker, but you could also print out the names and use contact paper to attach them. The permanent marker can actually be removed by using one of those Mr. Clean magic erasers.

Students work as a team to identify the instrument family and then put the cards in the appropriate spot. I store the cards in a plastic baggie, but a plastic travel soap box works really well too! You can see how I've used them to store crayons in THIS post. I think I'll store my cards in one of these next year.

As often as I can, I include a task card at the workstations I set up so that students can refer to them instead of running up to me every few minutes. I laminate the card and store it in a file box. I can easily direct a sub to find these supplies and set up workstations in my absence.
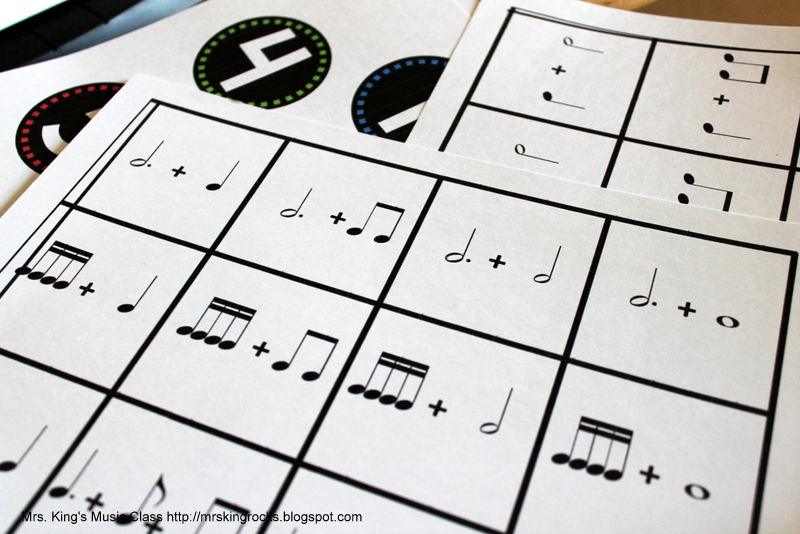
The next dip tray workstation that I've created helps students practice using their knowledge of note values. You can download this file for free HERE. The file contains two different sets of number labels that you can use to attach to your dip trays, rhythm addition problems and instructions.

I printed out the number labels, trimmed them and then laminated them and cut them out again. I attached them with Velcro.

I attached one part of the Velcro dot to the dip tray and the other to the back of the number. This allows me to switch up the activity and adjust it to meet the needs of my students.

In this activity students are asked to draw a card, add the note values together and then place the card in the space that matches their answer. The file has 25 different problems, but I usually include duplicates if we are just working a a few note values.
I used to use notes and addition problems written on index cards for this activity. Students sorted their cards into trays, coffee cans or whatever I had laying around. I love the convenience of using this activity with the dip tray and smaller cards.


I use this activity with several grade levels and some groups need the help of a note value chart. I love THIS one by Sara Bibee. It's a free download and is perfect for so many activities in music class.

This is an example of a modification I make for younger students or special learners. Instead of using all of the cards, I'll sort out the ones that equal 1, 2 and 4 and then set up the dip tray like this.

Students are still practicing the skill I need them to learn, but in a more controlled setting. I have plans for several other sorting activities that I could use with this dip tray. I love how easy it is to pull off all of the cards and replace them with whatever I may need.
I really hope that you enjoy using these files and that you like the dip tray workstations as much as I do!

I absolutely love your idea! :) This week, I purchased some materials and adapted it a bit to fit my studio's needs. Here is where I posted about it... https://www.facebook.com/smalltownmusiclessons/photos/a.10152163592467728.1073741826.313523412727/10153496555407728/?type=1
ReplyDeleteThank you for sharing your creativity and making your music room a "place to be!" :)
Thank you so much!
DeleteLove these ideas! Do you provide a way for kids to check their answers? If so, how?
ReplyDeleteI provide the note value chart (link above) but not an answer sheet. For the instrument version, they can check from a poster in my room or I'll check it as I walk around and monitor the centers.
Deletehow did you get the cards with the notation with addition symbol?
ReplyDeletethis is an amazing idea...totally using this!
I created them. Scroll up to the post and you'll find a link to grab it for free.
DeleteWhere did you get these trays? I checked at one dollar store, but I all I found were flimsy clear plastic trays. Thanks.
ReplyDelete