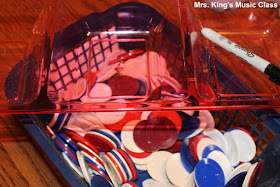
So by now, some of my faithful blog readers know that I love hitting the dollar stores for classroom finds. I love being able to set my ideas to reality inexpensively. It works for me! In this blog post I'll show you another one of my favorite workstations. It is quick and easy to make and can be quite versatile.
For this project you'll need a dip tray. I use the rectangle kind with three compartments, but other styles and sizes will work. I usually do not choose those that are transparent because they tend to show fingerprints and dust a bit more than the others. This was the only one I had that hadn't already been used.
You'll also need a black, permanent marker and some poker chips.
Number your compartments with a paint pen, permanent marker or by printing out some numbers and laminating them. I will use this center with second graders after I introduce the whole note so I chose the values 1, 2 and 4.
On the poker chips, draw notes or addition/subtraction problems on one side of the poker chip. There are several different kinds of poker chips that you can find at almost any discount stores. Some are VERY textured and others are not. Take a peek before you buy some to find ones that have the least textured center. These are easiest to write on.
Using a permanent marker or paint pen is a great way to mark up the poker chips, but if you plan to use them frequently you'll want to consider adding a protective clear coat to them.
When students use this center, they take turns pulling a chip out and deciding how many beats it is worth. They show the group the chip and say their answer. The group gives a thumbs up if they think it is correct and a thumbs down if they think it is incorrect. If the student has a correct answer, the chip goes in the dip tray. If not, the chip goes back in the pile (or bag or whatever container you want to use) and the next student takes a turn. There's not really a winner to this game. It's just another way to drill note values, but the charming sound of the chips clinking together is quite fun for students!
Are you contemplating using centers in your classroom this year? Check out this blog series:


Great idea! I've added poker chips to my yard sale search list!
ReplyDeleteI'm making this today! Can't wait to use it as a hands-on review activity!
ReplyDeleteI purchased poker chips waaaaay back in college, thinking they would make a good project. Now I have one! I don't dare say how long ago that was!!!!
ReplyDelete